

Table of contents
Discovering the Dubai Chocolate Bar
The Dubai Chocolate Bar has taken the dessert world by storm, capturing hearts with its rich flavors and eye-catching presentation. While it’s often associated with high-end patisseries, this recipe lets you bring the magic of Dubai into your own kitchen.
Origins and Popularity
The origins of the Dubai Chocolate Bar Recipe are as luxurious as its taste. This dessert became a viral sensation, initially popularized by the Fix Dessert Chocolatier in Dubai. Social media buzz, with its alluring visuals and promises of an unparalleled taste experience, elevated this chocolate bar to global fame.
But why is it so adored? Well, the answer lies in its perfect balance of textures and flavors: the crunch of toasted kataifi, the creaminess of pistachio filling, and the melt-in-your-mouth chocolate coating.
Unique Components of the Dubai Chocolate Bar
What truly sets this recipe apart are its distinctive ingredients, each playing a pivotal role in creating an unforgettable dessert.
- Pistachio Cream Filling: Smooth and nutty, the pistachio layer adds a luxurious taste that’s hard to resist.
- Crispy Kataifi Pastry: This shredded phyllo dough offers a delightful crunch, contrasting beautifully with the creamy filling.
- Decadent Chocolate Shell: The chocolate coating, whether milk, dark, or white, encases the bar in an irresistible glossy finish.
These unique elements not only make the Dubai Chocolate Bar Recipe a feast for the palate but also an elegant addition to any dessert spread
Ingredients and Equipment
Essential Ingredients for the Dubai Chocolate Bar Recipe
Crafting the Dubai Chocolate Bar Recipe requires a careful selection of high-quality ingredients. Each component contributes to the rich, indulgent taste and texture that makes this dessert so special.
- High-Quality Chocolate Selection:
The chocolate forms the base and shell of the bar, so quality is paramount. Choose couverture chocolate with a high cocoa butter content for a glossy finish and smooth texture. Milk, dark, or white chocolate works depending on your taste preferences. - Pistachio Paste or Cream:
The nutty, slightly sweet flavor of pistachio is a defining feature of this recipe. Ready-made pistachio paste can be used, or you can make it fresh at home by blending roasted pistachios with a touch of oil. - Kataifi (Shredded Phyllo Dough):
This crispy, shredded pastry adds an essential crunch. Widely used in Middle Eastern desserts, kataifi can be found in specialty stores or online. If you’re in a pinch, phyllo dough can serve as a substitute, but it won’t provide the same intricate texture. - Tahini and Its Role:
While not a traditional ingredient in chocolate bars, tahini lends a subtle creaminess to the pistachio filling. It also enhances the nutty flavor profile, giving the dessert an authentic Middle Eastern twist. - Optional Add-ins and Substitutions:
Want to add a personal touch? Consider incorporating flavors like orange zest, cardamom, or a dash of rose water into the pistachio filling. These additions can elevate the recipe while staying true to its exotic roots.
Necessary Equipment and Tools
To achieve professional results, having the right tools on hand is crucial. Here’s what you’ll need:
- Chocolate Molds:
These ensure uniformity and a polished appearance for your bars. Silicone molds are particularly user-friendly. - Double Boiler or Microwave for Melting Chocolate:
Melting chocolate evenly is key to preventing it from seizing. A double boiler is ideal for controlled heating, but a microwave can also be effective if used in short intervals. - Pastry Brush and Spatula:
A pastry brush helps coat the molds evenly, while a spatula is perfect for smoothing layers. - Thermometer for Tempering Chocolate:
Tempering gives the chocolate its characteristic snap and glossy finish. A thermometer ensures precise temperature control during the process.
Step-by-Step Preparation Guide for Dubai Chocolate Bar
Creating the Dubai Chocolate Bar Recipe is as much about precision as it is about creativity. This section provides a detailed, step-by-step breakdown of the preparation process, ensuring that each layer is executed flawlessly.
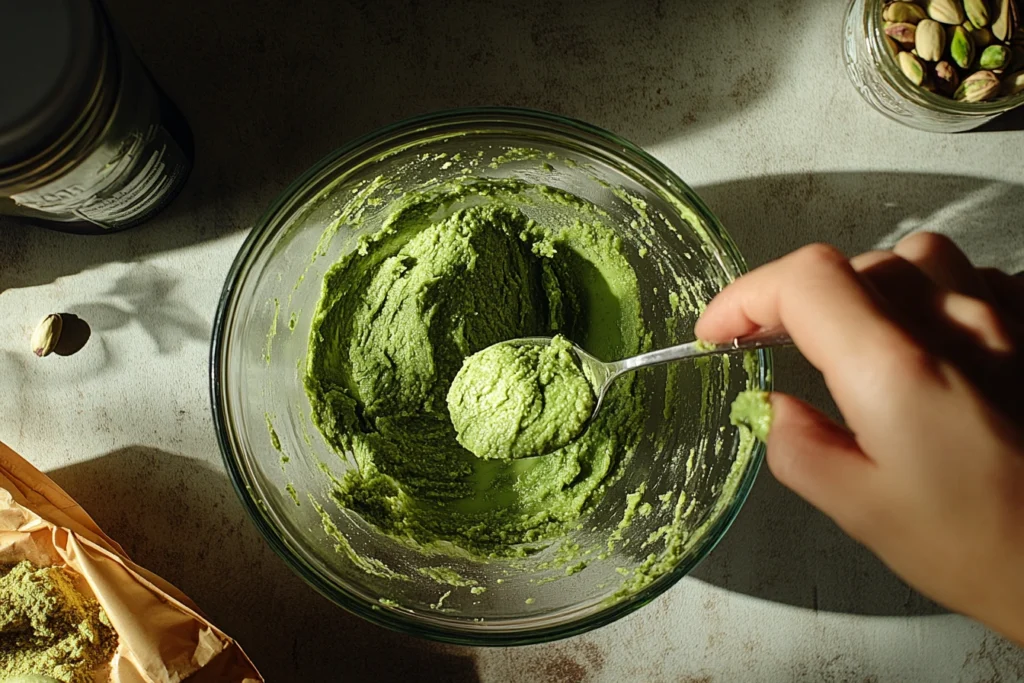
Preparing the Pistachio Filling
The pistachio filling is the heart of this dessert, delivering a creamy, nutty richness that pairs beautifully with the chocolate shell and crunchy kataifi.
- Making Homemade Pistachio Paste:
If you’re starting from scratch, roast shelled pistachios in the oven at 350°F (175°C) for 5–7 minutes to enhance their flavor. Blend them in a food processor until smooth, adding a small amount of neutral oil if needed for consistency. - Combining Pistachio Paste with Tahini:
Mix the pistachio paste with a touch of tahini to add creaminess and balance. This step infuses a subtle earthiness into the filling, complementing the sweetness of the chocolate. - Adjusting Sweetness and Consistency:
Add powdered sugar or honey to sweeten the paste to your liking. For a smoother texture, incorporate a small amount of heavy cream or condensed milk, blending until the mixture is silky.
Toasting the Kataifi Pastry
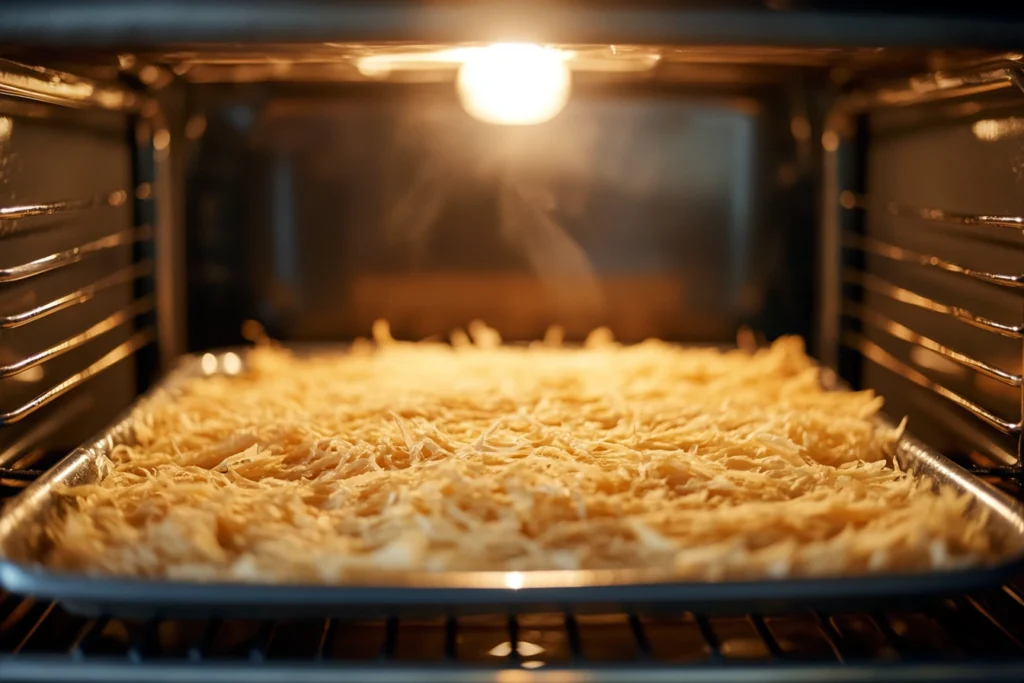
The kataifi adds a delightful crunch, providing a textural contrast to the creamy filling and smooth chocolate shell.
- Separating and Chopping Kataifi:
Kataifi dough often comes tightly packed. Gently separate the strands and chop them into small pieces to ensure even toasting. - Toasting to Golden Perfection:
Spread the chopped kataifi evenly on a baking sheet, drizzle with melted butter or ghee, and toast in the oven at 350°F (175°C) until golden brown. This typically takes 8–10 minutes, but keep an eye on it to avoid burning. - Ensuring Optimal Crunchiness:
Allow the toasted kataifi to cool completely before using it in the recipe. This step locks in its crisp texture, which is crucial for the bar’s overall appeal.
Melting and Tempering the Chocolate
Achieving a smooth, glossy chocolate shell is essential to the success of the Dubai Chocolate Bar Recipe. To ensure perfection, tempering the chocolate is critical, as it guarantees the ideal snap and sheen.
When it comes to melting chocolate, there are two reliable methods to choose from. First, you can use a double boiler, which provides gentle and even heating to avoid scorching. Alternatively, you can microwave the chocolate in 15-second intervals, but be sure to stir it between each session. This approach prevents overheating and ensures a smooth consistency.
Achieving a Glossy Finish and Crisp Snap
To achieve optimal results, heat the chocolate to the correct temperature based on its type: dark chocolate to 113°F, milk chocolate to 104°F, and white chocolate to 100°F. Then, cool the chocolate to the tempering range and gently reheat it slightly. By doing this, you’ll create a glossy finish and the perfect crisp snap. Of course, using a thermometer ensures accuracy throughout the process.
Assembling the Dubai Chocolate Bar
Now that your components are prepared, it’s time to bring everything together. Assembling the Dubai Chocolate Bar Recipe requires patience and precision to create a treat that looks as good as it tastes.
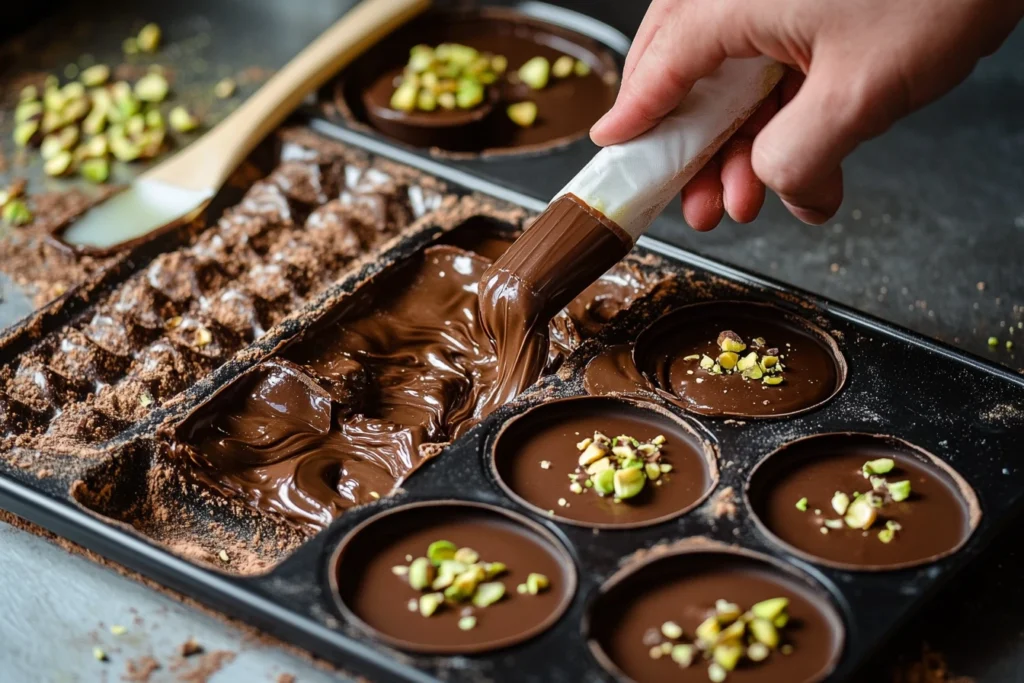
Molding the Chocolate Shell and Adding the Filling
The chocolate shell is the foundation of the Dubai Chocolate Bar. It needs to be sturdy enough to hold the filling yet thin enough to melt smoothly on the tongue.
- Coating the Molds Evenly:
Use a pastry brush or spoon to coat the interior of your chocolate molds with a thin layer of tempered chocolate. Swirl the mold to ensure full coverage. - Removing Excess Chocolate:
After coating, invert the mold to let any excess chocolate drip out. This step ensures that the shell remains uniform and doesn’t become overly thick. - Setting the Shell Properly:
Place the molds in the refrigerator for about 10–15 minutes, allowing the chocolate to set completely before adding the filling. This step prevents the filling from mixing with the shell layer.
The filling is where the magic truly happens, blending flavors and textures to create a rich, indulgent experience. With every layer, you’re building a dessert that’s not only delicious but also visually stunning.
Layering the Pistachio and Kataifi Mixture
To start, add a generous layer of pistachio filling to the chocolate shell. Use a spoon or piping bag for precision, as this helps ensure even coverage. Once this is done, follow up with a layer of toasted kataifi, pressing it gently to help it adhere to the pistachio filling. This combination of creamy and crunchy textures is what makes the Dubai Chocolate Bar Recipe so irresistible.
Ensuring Even Distribution
After layering the filling, take care to smooth out each section. For the best results, use a spatula or the back of a spoon to avoid any air pockets or uneven textures. By doing this, you’ll achieve a perfectly uniform structure in every bite.
Leaving Space for the Top Layer and Sealing the Chocolate Bar
While adding the filling, remember to leave enough room at the top of the mold for the final chocolate layer. This is crucial, as the top layer seals in the filling and ensures the bars stay intact.
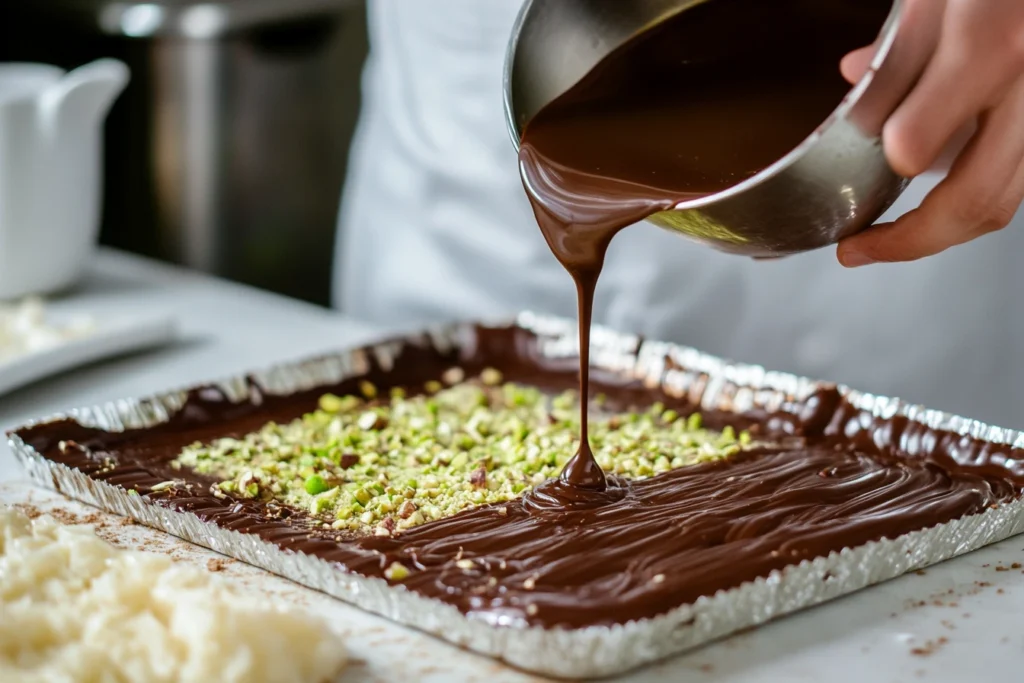
Pouring the Final Chocolate Layer and Smoothing the Surface
To begin sealing, pour the remaining tempered chocolate over the filled molds. Ensure that the chocolate covers the filling completely, leaving no gaps. This creates a flawless, uniform finish.
Next, use a spatula to level the top layer of chocolate. This simple action not only gives the bars a professional appearance but also prevents uneven spots. Additionally, gently tap the mold on the counter to remove any trapped air bubbles, ensuring a perfectly smooth surface.
Final Setting Process
After the chocolate layer is smooth, place the molds in the refrigerator for 15–20 minutes, or until the chocolate hardens fully. Finally, once the chocolate has set, carefully remove the bars from the molds. Handle them gently, as this will preserve the glossy finish and keep the bars looking pristine.
Decorating the Chocolate Bars
*Enhance the appearance of your Dubai Chocolate Bar Recipe with creative and luxurious decorations that reflect the dessert’s Middle Eastern roots.
- Adding Artistic Chocolate Splashes:
Use contrasting melted chocolate (e.g., white or dark) to drizzle or splatter over the bars. This adds a touch of artistic flair and visual interest. - Using Edible Gold Leaf:
For a true Dubai-inspired look, adorn the bars with edible gold leaf. Carefully press small pieces onto the surface of the bars using a clean, dry brush for a glamorous finish. - Creative Presentation Ideas:
Serve the bars on elegant platters with a sprinkling of crushed pistachios or dried rose petals for a Middle Eastern-inspired aesthetic.
Serving Suggestions
Presentation plays a vital role in the overall experience of enjoying these decadent bars. Pairing and serving them thoughtfully will take your dessert to the next level.
- Pairing with Beverages:
The richness of the chocolate ly with hot beverages like Turkish coffee, espresso, or a spiced chai latte. For a refreshing contrast, try serving with a cold glass of almond milk or rose-infused iced tea. - Ideal Occasions for Serving:
These chocolate bars are perfect for special events such as weddings, birthdays, or dinner parties. Their luxurious presentation also makes them a thoughtful gift for friends and family. - Storage Recommendations:
To maintain the bars’ texture and flavor, store them in an airtight container in the refrigerator. Avoid exposure to humidity or direct sunlight, which can cause the chocolate to lose its shine or bloom. When stored properly, these bars can stay fresh for up to two weeks.
Tips, Variations, and FAQs
Mastering the Dubai Chocolate Bar Recipe involves a bit of finesse and creativity. In this section, you’ll discover expert tips for success, unique variations to try, and answers to frequently asked questions.
Expert Tips for Success
Making these luxurious chocolate bars can seem intimidating, but with these tips, you’ll avoid common pitfalls and achieve a professional finish.
- Ensuring Ingredient Quality:
Always choose high-quality chocolate and fresh pistachios. The flavors in this recipe rely heavily on the quality of the ingredients, so splurging a little pays off. - Troubleshooting Common Issues:
If the chocolate shell cracks, ensure you’re tempering it correctly and not handling it too soon after setting. For a smoother pistachio filling, blend until completely emulsified, adding cream if necessary to achieve the right consistency. - Enhancing Flavor Profiles:
Incorporate a pinch of sea salt into the chocolate or pistachio filling to balance the sweetness. A dash of vanilla extract or rose water can also add depth to the flavor.
Variations of the Dubai Chocolate Bar Recipe
Personalizing this recipe is part of the fun. Here are a few variations to inspire your creativity:
- Alternative Nut Fillings:
Swap pistachios for hazelnuts, almonds, or even macadamia nuts. Each nut brings its own distinct flavor and texture to the bars. - Different Chocolate Types:
Experiment with ruby chocolate for a tangy twist or mix dark and milk chocolate for a layered effect. White chocolate can also be infused with flavors like matcha or saffron. - Incorporating Additional Flavors:
Add dried fruits such as figs or apricots to the filling for a chewy texture. Spices like cardamom, cinnamon, or nutmeg can give the bars a warm, aromatic note.
Frequently Asked Questions
Can I use phyllo dough instead of kataifi?
While phyllo dough can be used as a substitute, it won’t provide the same crispy texture as kataifi. If you do opt for phyllo, be sure to layer and butter it generously before baking.
How should I store the chocolate bars?
Store the bars in an airtight container in the refrigerator to keep them fresh and prevent the chocolate from melting. Allow them to come to room temperature before serving for the best flavor and texture.